Fluffy AF Popcorn Hat

Like every good pattern, this one has a story. Click here to read it.

Not interested in a long yarn? (lol)

Just want the pattern?

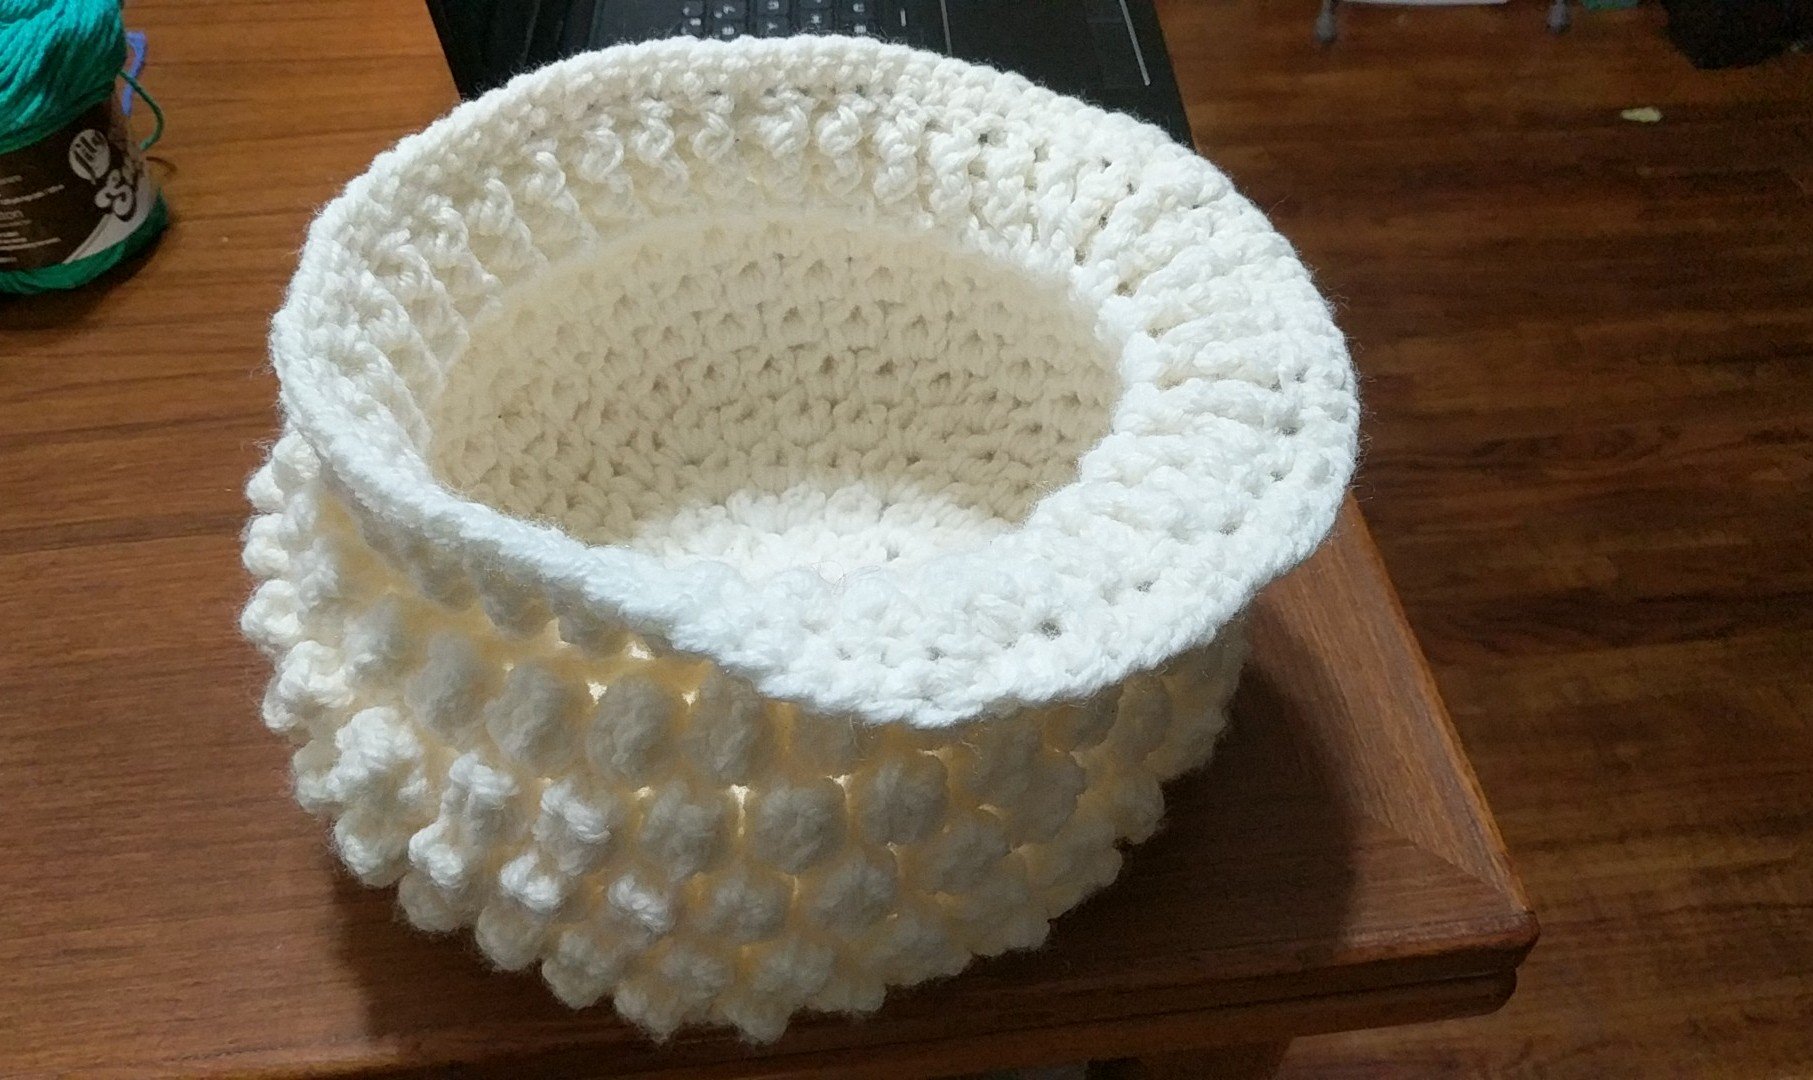
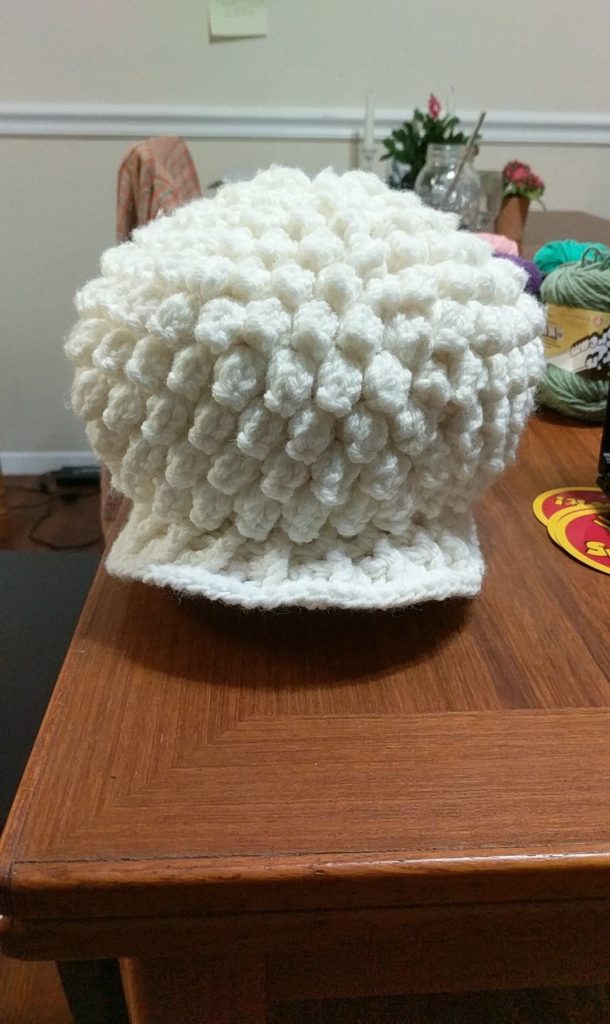
Then know this… the pattern as written makes a big hat. It’s about 10.5″ in diameter, and 6″ from top to band. I think if you ditch row 7 (and adjust stitch counts and repeats in the remaining rows) it will help quite a bit. If you want to keep it wide on top  but snug at the bottom, you could double the number of decreases in rows 9 and 10. I’ll be updating with a smaller version once I’ve made version 2 of this hat.

Legal note: This is my pattern. There are (probably) many like it, but this one is mine. It is free. You’re welcome to use it to make hats and derivative works, and even to share and modify the pattern. However, if you redistribute the pattern (either in its original form or modified) please include a link back to the original here.

Thanks!

So… without further ado…

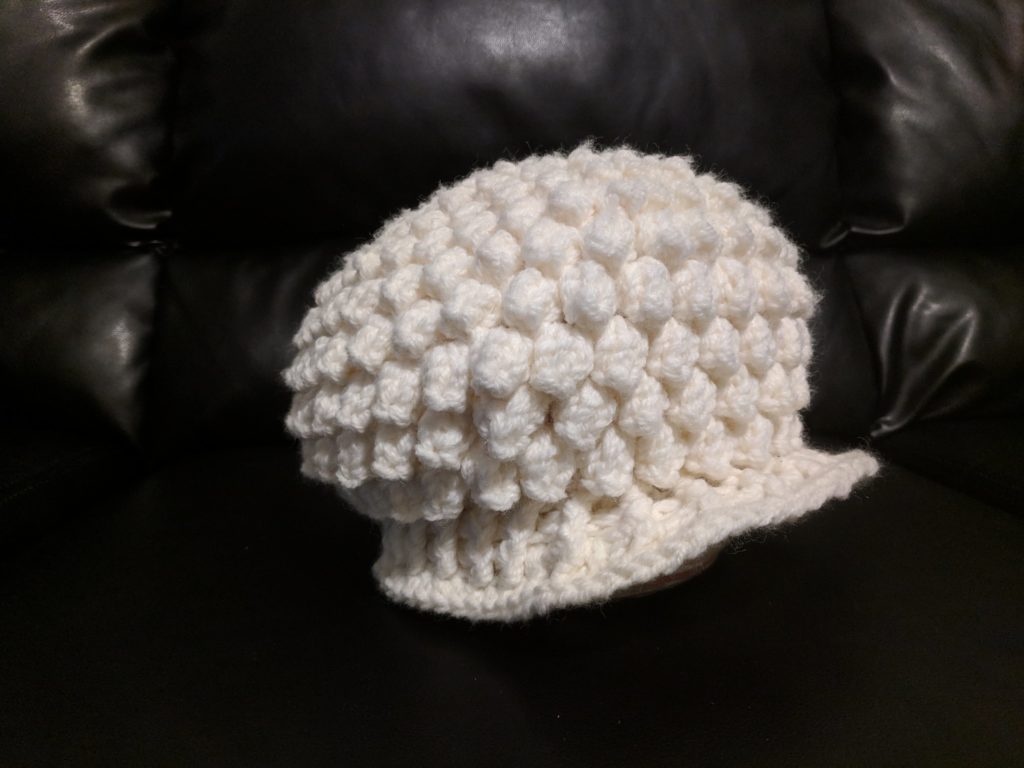
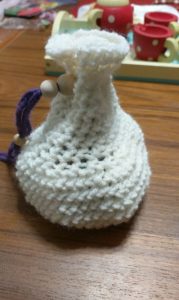
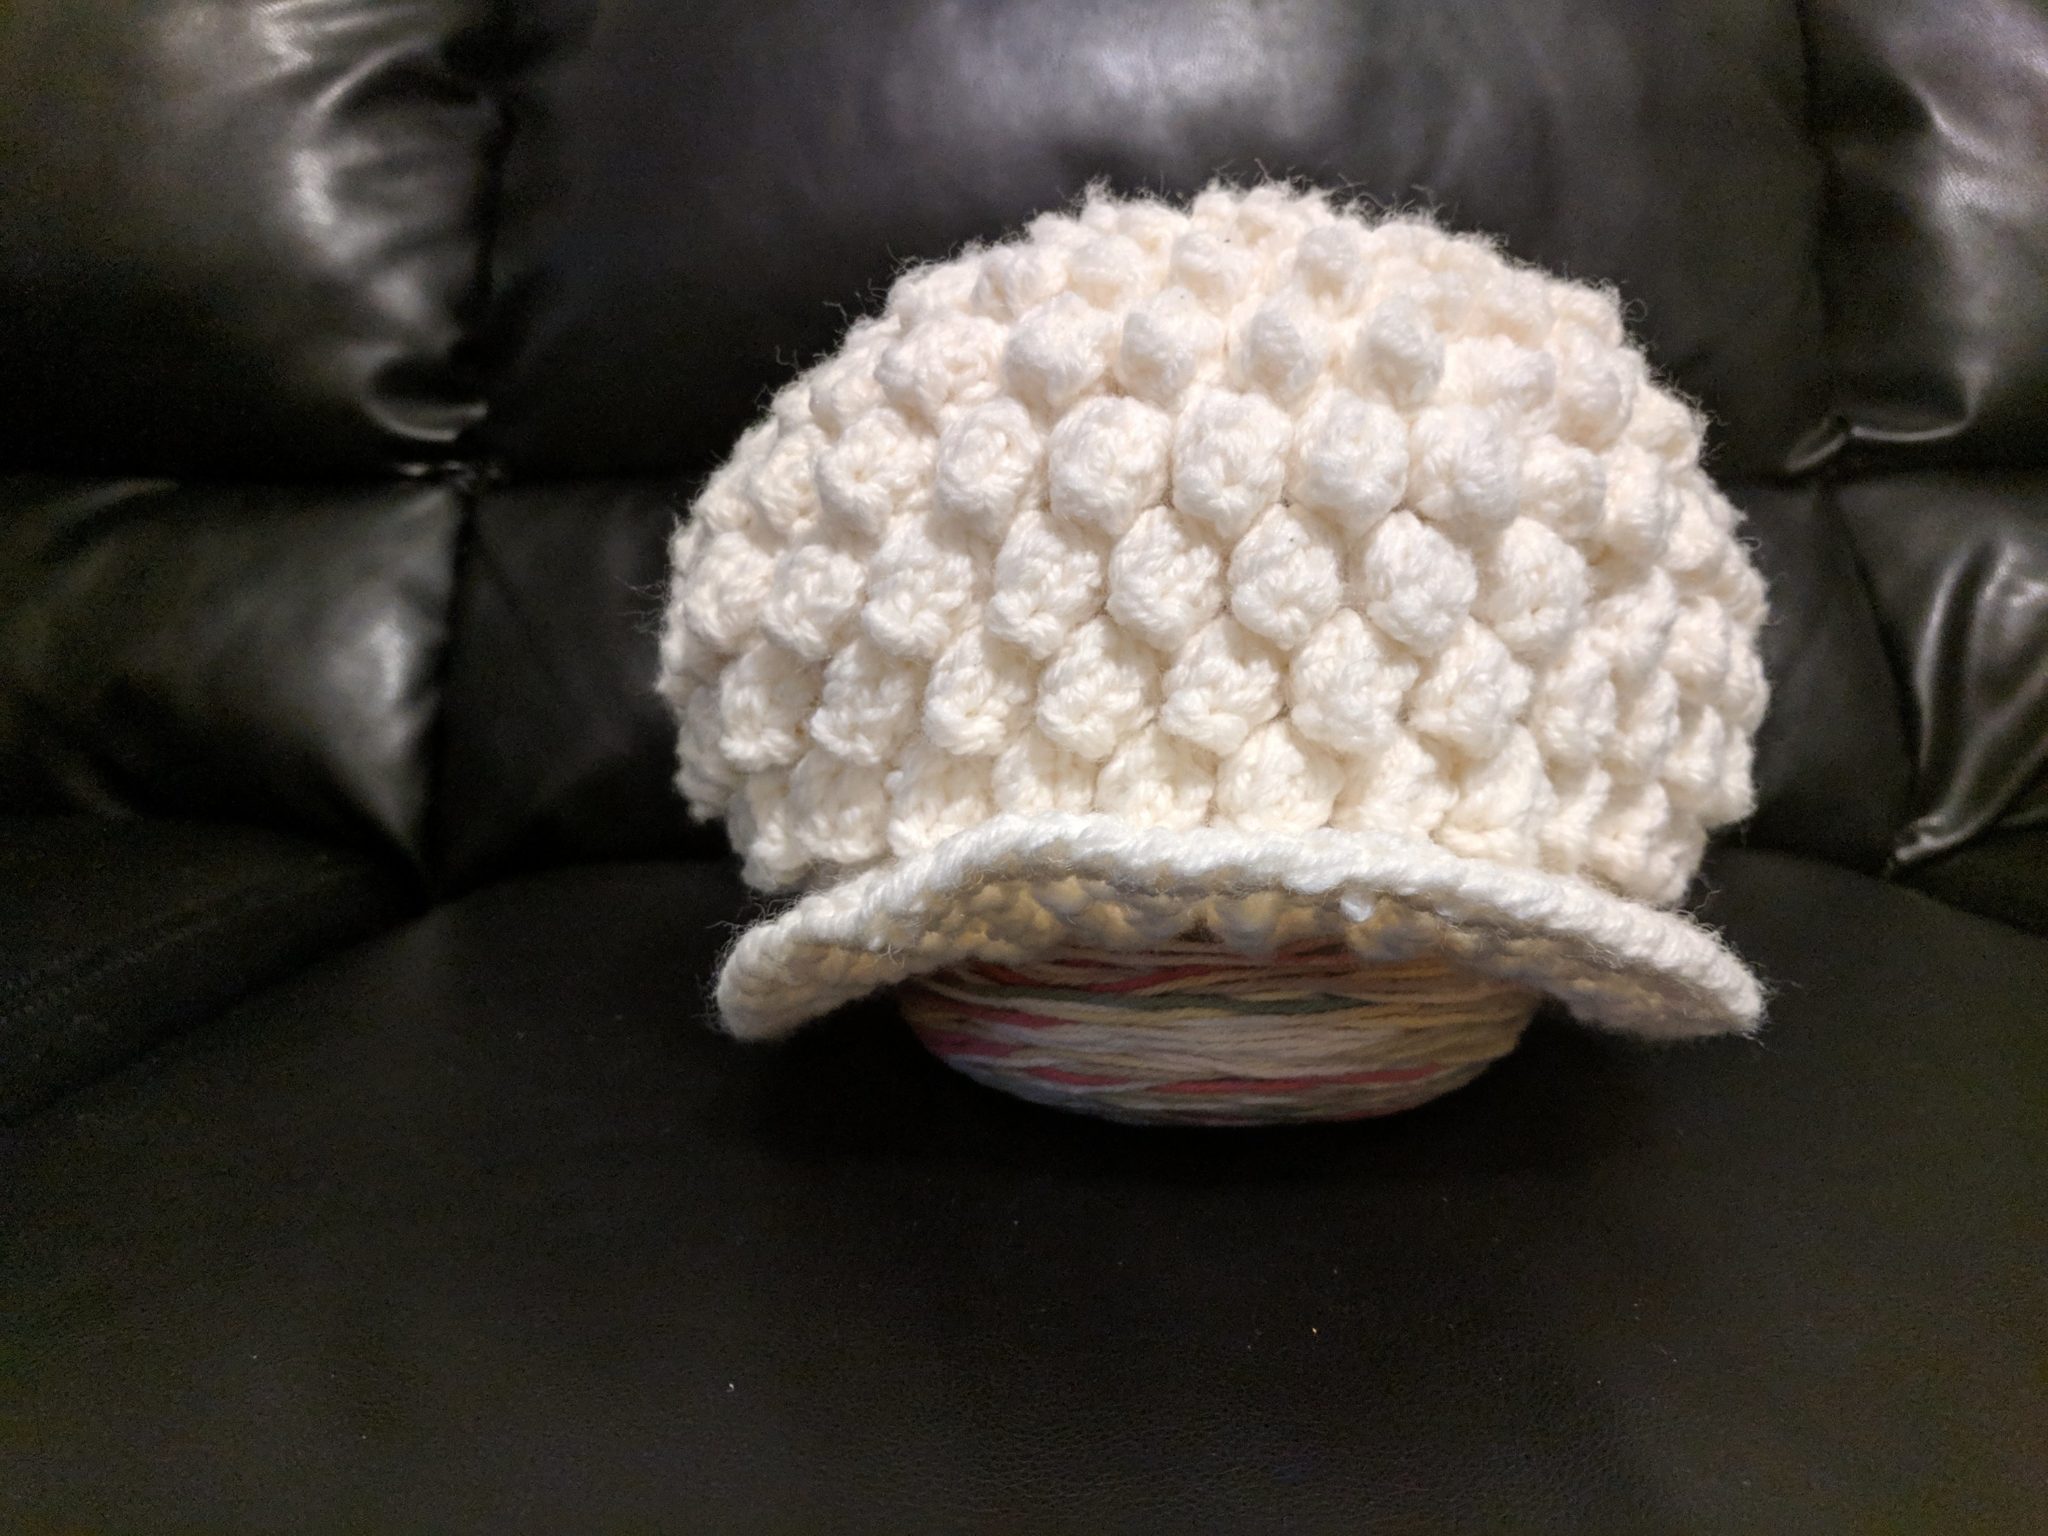
The Fluffy AF Popcorn Hat

Stitch Abbreviations

  • Magic Circle (played by itself)
  • sc – Single Crochet
  • dc – Double Crochet
  • ss – Slip stitch
  • ch – Chain
  • fpdc – Front Post Double Crochet
  • bpdc – Back Post Double Crochet
  • popcorn – 5DC Popcorn Stitch
  • pop2tog – Popcorn Decrease (my version)
  • ch3pop – A popcorn where the first DC is the starting ch3 of the row.
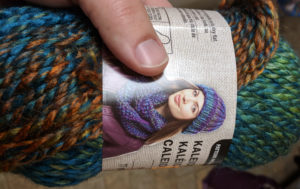
Yarn

~500-600 yards of Plymouth Encore Worsted (Winter White) – 75% Acrylic, 25% Wool

Note: This is not the softest yarn ever. In fact, I might even call it a little scratchy. It’s really easy to work with, though… and it’s fking gorgeous.

Scale

Each of my popcorn stitches is about 3/4″ wide by 1″ long.
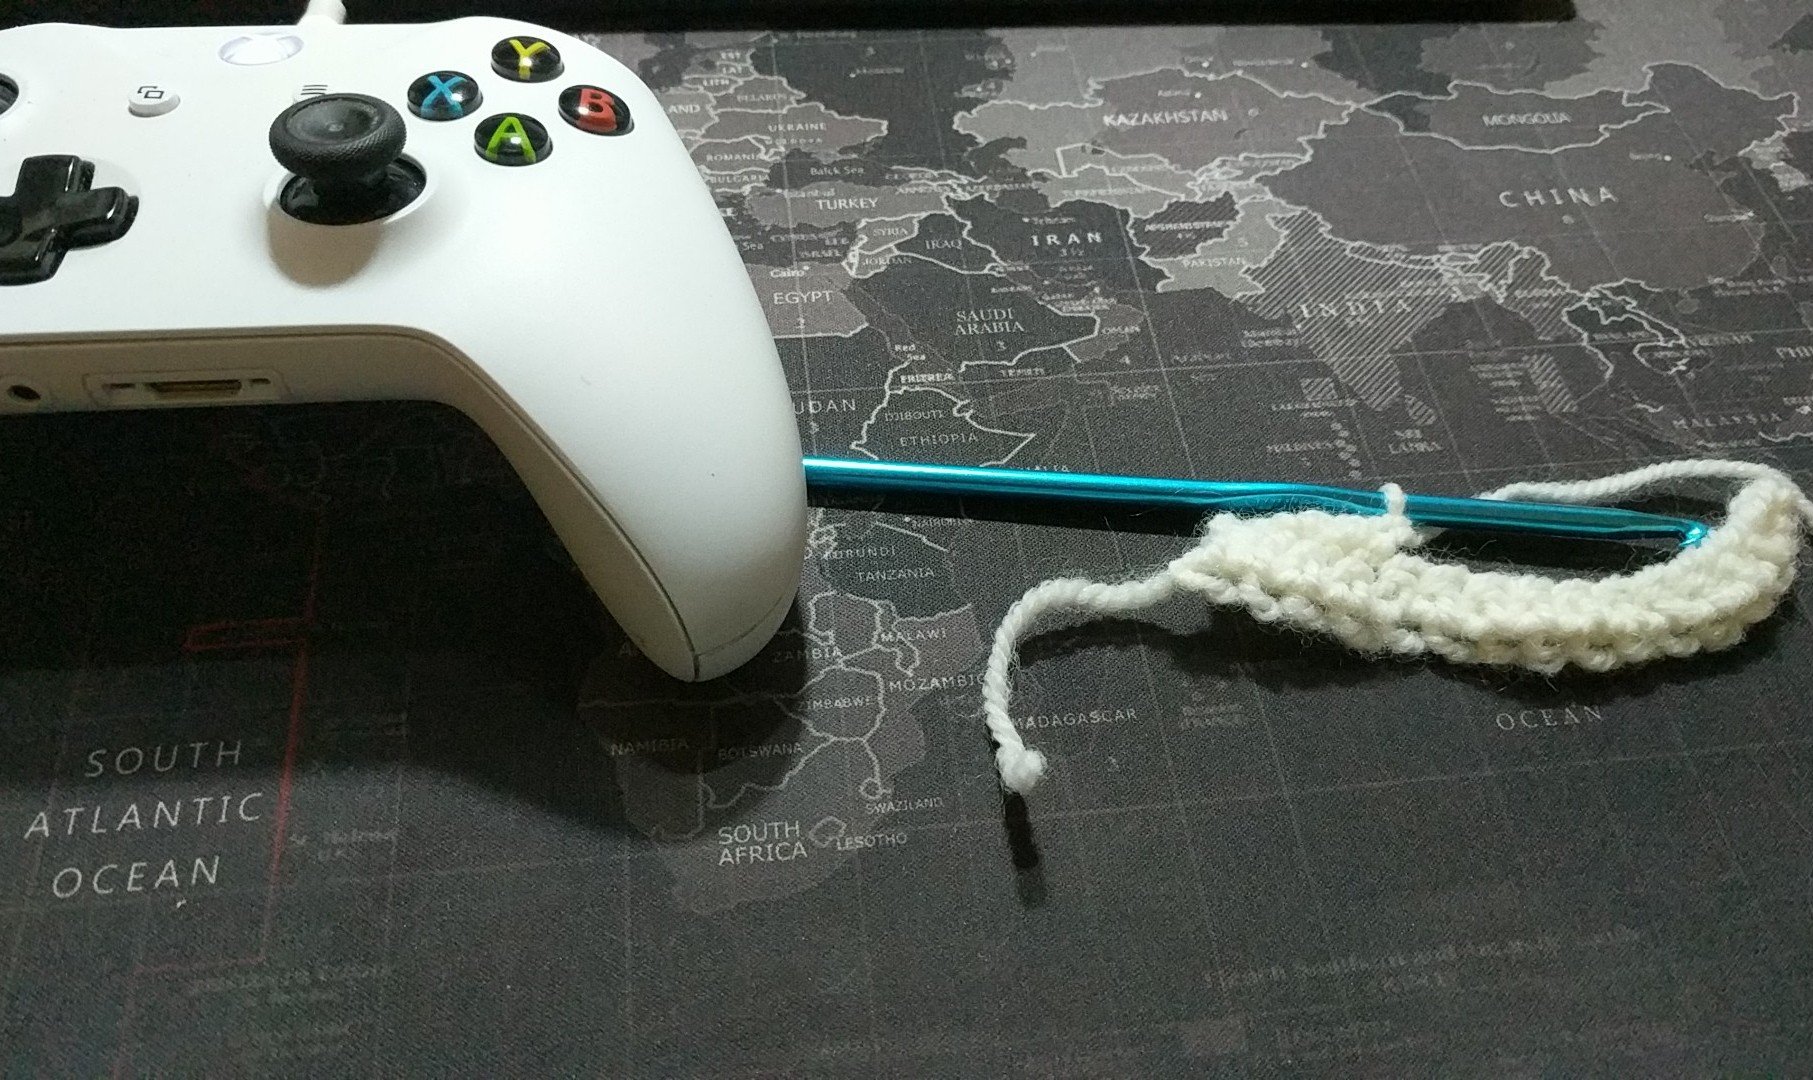
Hook

6.5mm

Stitch Guide

Magic Circle: This video explains it better than I can.

popcorn (Popcorn Stitch): Work 5 dcs into the same stitch or stitch space. Remove your hook from the loop. Insert your hook through the top of the first dc, front to back. Hook the loop and pull it through. ch1 to seal it closed.

pop2tog (Popcorn Decrease): I don’t know if this is the right way to do it, but it works great! So it’s how you’re gonna do it if you follow this pattern to the T.Work 2 dcs into the first stitch space. Work a dc2tog across the popcorn from the previous row (yarn over, insert into the first stitch space, yarn over, pull through the stitch space, yarn over, pull through 2 loops, yarn over, insert into the second stitch space, yarn over, pull through the second stitch space, yarn over, pull through 2, yarn over, pull through all 3 remaining loops.) Work 2 dcs into the second stitch space. 
Remove your hook from the loop. Insert your hook through the top of the first dc, front to back. Hook the loop and pull it through. ch1 to seal it closed.

ch3pop (Row-Starting Popcorn): Chain 3. Work 4 DCs into the stitch space just BEHIND the chain.  Remove your hook from the loop. Insert your hook through the third ch of the ch3, front to back. Hook the loop and pull it through. ch1 to seal it closed.

fpdc (Front Post Double Crochet): A double crochet that, instead of being worked into the top loop of a stitch, is worked around the post of the stitch from the front. See this video.

bpdc (Back Post Double Crochet): A double crochet that, instead of being worked into the top loop of a stitch, is worked around the post of the stitch from the back. See this video.

[…] x times: Items in square brackets are sections to be done x number of times. 

The Pattern

Working with two strands at once, throughout.

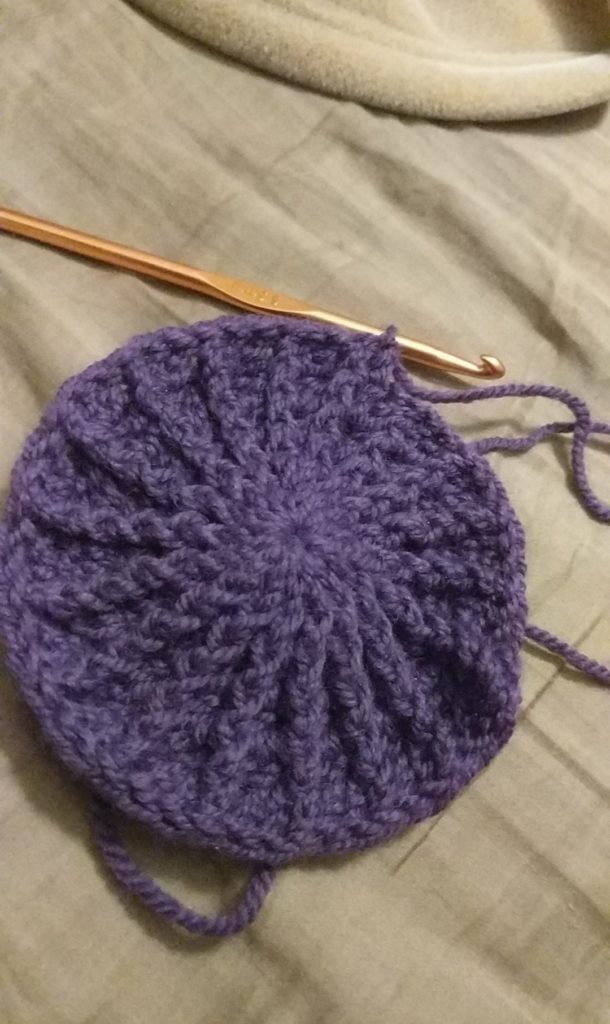
Foundation: Magic circle. 

Row 1: ch1 (counts as first sc). Work 6 sc into the magic circle. ss into the first ch1 to join. (7 sc)

Row 2: ch3pop in first sc. [1 popcorn in next sc] 6 times. ss around starting ch3 to join. (7 popcorn)


Increases start here. This will form the top of the hat. It may seem somewhat flat at first, but it will round out quite a bit when worn. For a smaller hat you can reduce the number of rows in this section. To curve it in more, you could do 4 increases instead of 7 in rows 5 and/or 6.

Row 3: ch3pop in first stitch space. [2 popcorn in next stitch space] 6 times. 1 popcorn in final stitch space. ss around ch3 of starting ch3pop to join. (1 ch3pop, 13 popcorn)

Row 4: ch3pop in first stitch space. [2 popcorn in next stitch space] 6 times. 1 popcorn in same stitch space as the starting ch3pop. ss around ch3 of the starting ch3pop to join. (1 ch3pop, 13 popcorn)

Row 5: ch3pop in first stitch space. 1 popcorn in the next stitch space. [2 popcorn in next stitch space, 1 popcorn in the next stitch space] 6 times. 1 popcorn in same stitch space as the starting ch3pop. ss around ch3 of the starting ch3pop to join. (1 ch3pop, 20 popcorn)

Row 6: ch3pop in first stitch space. 1 popcorn in next 2 stitch spaces. [2 popcorn in next stitch space, 1 popcorn in next 2 stitch spaces] 6 times]. 1 popcorn in same stitch space as the starting ch3pop. ss around ch3 of the starting ch3pop to join. (1 ch3pop, 27 popcorn)

I would recommend skipping Row 7 and adjusting stitch counts further down… unless you have a big head like me. I *think* this is the row that made the hat too big for my wife.

Row 7: ch3pop in first stitch space. 1 popcorn in next 2 stitch spaces. [2 popcorn in next stitch space, 1 popcorn in next 3 stitch spaces] 6 times]. 1 popcorn in same stitch space as the starting ch3pop. ss around ch3 of the starting ch3pop to join. (1 ch3pop, 34 popcorn)


Vertical bits! Want a taller hat? Repeat this row ad nauseam! Adjust the number of rows depending on the desired height. For measurement, the center of the hat should sit toward the back top of the head, and you want this section to end maybe an inch or so above the tips of the ears.

Row 8: ch3pop in first stitch space. [1 popcorn in next stitch space] 34 times. ss around ch3 of the starting ch3pop to join. (1 ch3pop, 34 popcorn)


Here we start to curve back inward. These rows should start to hug the ears.

Row 9: ch3pop in first stitch space. 1 popcorn in next 4 stitch spaces. pop2tog across next 2 stitch spaces, 1 popcorn in next 15 stitch spaces. pop2tog across next 2 stitch spaces. 1 popcorn in next 11 stitch spaces. ss around ch3 of the starting ch3pop to join. (1 ch3pop, 2 pop2tog, 30 popcorn)

Row 10: ch3pop in first stitch space. 1 popcorn in next 12 stitch spaces. pop2tog across next 2 stitch spaces, 1 popcorn in next 15 stitch spaces. pop2tog across next 2 stitch spaces. 1 popcorn in next 3 stitch spaces. ss around ch3 of the starting ch3pop to join. (1 ch3pop, 2 pop2tog, 28 popcorn)


One more straight row for good measure.

Row 11: ch3pop in first stitch space. [1 popcorn in next stitch space] 30 times. ss around ch3 of the starting ch3pop to join. (1 ch3pop, 30 popcorn)


Brim time! Finally done with popcorn! The join of each row will be the rear of the hat.

Row 12: ch1 (counts as first sc). ch1. [sc in next stitch space, ch1] 30 times. ss into starting ch1 to join. (31 sc, 31 ch)

Row 13: ch3 (this chain will be ignored). fpdc around first sc (actually a ch1) in row 12, dc in next chain space. [fpdc around next sc, dc in next ch1 space] 10 times. [fpdc around next sc, 2 dc in next ch1 space] 8 times. [fpdc around next sc post, dc in next ch1 space] 11 times. ss into top of first fpdc to join. (31 fpdc, 39 dc)

Row 14: ch3 (this chain will be ignored). fpdc around first fpdc post in row 12. bpdc around next dc. [fpdc around next fpdc, bpdc around next dc] 10 times. [fpdc around next fpdc, 2 bpdc around next dc, 2 bpdc around next dc] 8 times. [fpdc around next fpdc, bpdc around next dc] 11 times. ss into top of first fpdc to join. (31 fpdc, 47 bpdc)

Row 15: ch1 (counts as first sc). sc in next 77 stitches. ss into starting chain. Finish off and weave in ends. (78 sc)
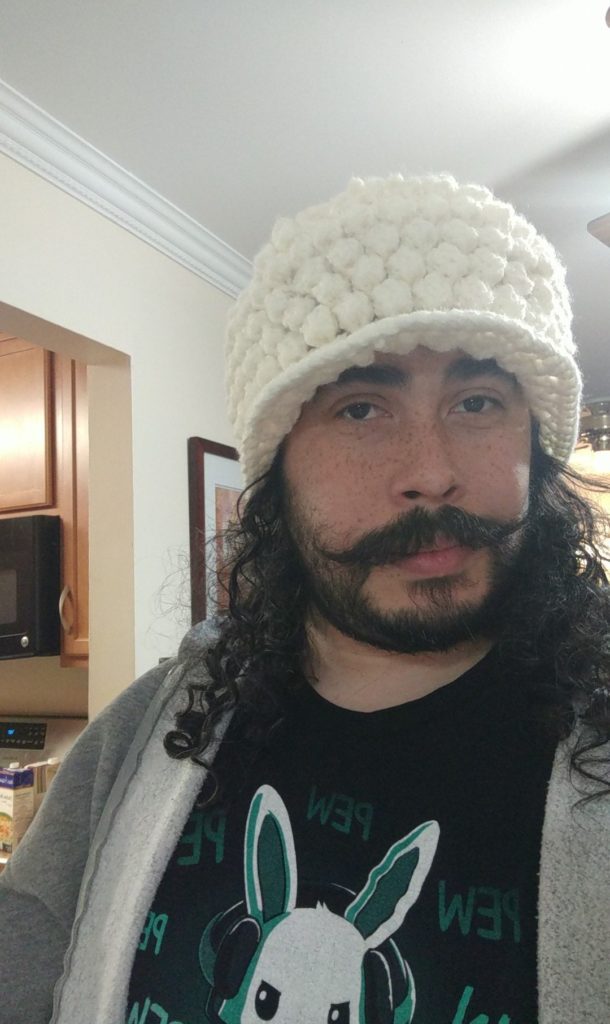
Hatty McFailHat!

From what I hear… failure is an inevitable part of growth. This is the story of my first big crochet fail… and it just happened this week! (Holy cow, a timely post!) It is a story of experimentation, triumph, disappointment, adventure, and quite a few hand cramps.

Luckily, this fail isn’t all doom and gloom. The final product is definitely usable for something… just not its intended purpose.

It all started when my lovely wife asked me for a hat. The kids had been harping on her for not wearing a hat at the bus stop (which is pretty reasonable – it’s been friggin’ 26 degrees out in the morning!)

The particular style of hat she wanted was a popcorn hat. I don’t remember the particular picture she showed me, but it was a cute hat worked in popcorn stitch, with a little brim at the bottom, and I think a flower. She said the flower wasn’t particularly important, so I decided not to make one. I can’t go putting flowers on ALL the hats I make, can I?

I’d been wanting to try working with two strands of yarn at once (for extra bulk and warmth), so I snagged two skeins of a creamy white acrylic/wool blend from our stash (we’ve got a bunch of it!), center-pulled them both perfectly, pulled out a nice new 6.5mm hook (I switched to saw cut! I love it! I should make a separate post about that soon…), and started playing.

Now, for hats, I start at the top and work outward in the round. It just feels natural in my head. I have never done a hat working up from the brim. I should probably try, for the hell of it. It might help in sizing… which I had issues with here.

But for now… we’re going from the top down.

So of course, working top-down in the round, that means I started with a magic circle. I prefer the magic circle to chaining a circle. I find it easier to work into, and the fact that you can cinch it tight before working in your ends tends to result in a cleaner end result. If you’re following along, you could probably ch4 and ss to join instead, if you prefer.

If you haven’t done a magic circle before, it can feel a little weird. I’ve tried a few different methods for the magic circle, but this is the one that feels best in my hand, and it’s wide enough to easily work into, without being so big that it flops around.

This is probably a good time to mention that if you’re wanting to crochet along with this story, I posted the pattern separately. So if my story bores you and you just wanna recreate the hat…

Oh, you’re still here? Then back to the story!

As I said, I worked this hat holding two strands of worsted weight yarn together. I ended up using almost 3 full skeins of yarn. This hat has some heft. And as I discovered later… when working with two strands at once, one skein may run out considerably earlier than the other.

So, anyway. Into the magic circle, I worked 6 popcorn stitches, but it felt wrong. The original idea was to do pure popcorn all the way down to the brim. However, as I toyed with the first row, I ended up doing 7 single crochets into the magic circle, cinching it tight, and working my first round of popcorns into the single crochets. The stitch density felt right with 7.

Before I talk about what I did next, I just want to say. Popcorn stitch is a mess. Mind you, I’m still recovering from 2 months of running our Cub Scout Pack’s big popcorn fundraiser… so the word “popcorn” still triggers a visceral reaction in me. But any stitch that has a step of “remove your hook and reinsert it somewhere else” just seems wrong! WRONG I SAY!

I was also not prepared for how to start each row after the first. Popcorns fit nicely nestled into the stitch space between the popcorns of the previous row… but the starting chain of each row doesn’t line up nicely with that stitch space. I ended up chaining 3 to start each row (counts as the first DC of the popcorn), and working the rest of that first popcorn kinda behind the base of the chain. It makes for an awkward start, but it looks pretty much exactly the same as all the other popcorns… so whatever.

So, let’s see. We’re at row 3… the first “increase”. I wanted a fairly slow, constant slope to the top of the hat, so I went with adding 7 stitches to each row. 7 also happens to be a prime number, which makes it a little awkward to increase evenly at a lower rate. In each space between the 2nd row’s popcorns, I worked two new popcorns. For row 4, I did 2 popcorns in one space, 1 popcorn in the next space, then 2, then 1, etc.

This is about where the first hand cramp came in. I found it really difficult at first to work the second popcorn into each stitch space. It’s tight… I mean, you’re basically working 10 DC stitches around a single chain! So be warned… rest frequently and avoid the temptation to force it. Your hands will thank you.

Now, I was not prepared for just how big double-stranded popcorns were going to be. They’re massive. They’re almost 3/4″ thick, and squishy as all get out. (And they kinda actually look like popcorn… which triggered me again.) But being big… I had some trouble getting the right row count to hit my wife’s head size.

Okay. A lot of trouble.

I thought I got it right, actually, after a few measurements. I stopped increasing, straightening out for 2 rows. And then I tried it on her, thinking I was just going to get a feel for how many rows I was going to need to cover her ears.

Remember when you were a kid, and you put a soup pot or a mixing bowl on top of your head and pretended it was a helmet, or whatever you happened to be pretending?

Yeah. It looked like that… but with pretty white stitches.

So I thought to myself “Oh, it’s only an extra inch-ish of room, I’ll frog a few rows of increases and it’ll be fine.”

LOL

– Me, in hindsight.

So I frogged 4 rows (2 straight, 2 with increases), balling the two strands of yarn together as I frogged it to prevent tangles.

Now, let me tell you something about frogging when you’ve been working with 2 strands. Those strands are not exactly the same length. Because of the way the yarn works in and out of stitches, one strand is going to be longer than the other. What that means for frogging is that they don’t pull out evenly. One of the strands will snag. Constantly. It’s really annoying. 

Or maybe that was just me.

Oh, and did I mention that popcorn uses a TON of yarn? No? Well, popcorn uses a ton of yarn. Now you know.

Okay! All frogged. Let’s start this up again!

With my nice ball of yarn sitting comfortably between me and the two skeins, I went directly into straight rows. I got about halfway through the first row when I realized with growing terror what that ball of yarn was doing.

If you haven’t noticed before… when you do anything with yarn (ball, it crochet it, knit it) it tends to rotate a little. And when you’re pulling from the outside of a ball (or skein), the ball rotates a LOT as you pull yarn off of it. This isn’t usually a problem with one strand of yarn. But with two, wrapped into a ball… that has two strands coming out of its center that are still anchored to their skeins…

I was making a massive twisted tangle between the ball and the two skeins.

Thank goodness for my amazing wife.

My wife is an expert at untangling yarn. She stepped in and helped sort out the mess I’d accidentally created.

She’s the best. That’s why I’m making her a hat!

Okay. Deep breaths. Massive tangle averted. I made it through the next couple rows without incident.

…you know that old adage, “Measure twice, cut once?” Yeah, I really should have been more careful and accurate with my measurements when I realized it was too big. 

It was still friggin big on her.

But that’s okay. I was still super-positive! The popcorns looked pretty, and I’d made it through the tangled mess of frogged yarn without burning the house down or screaming at the children!

So I says “I’ll just do a couple decreases each row to bring it back down, and it’ll be a teensy bit roomy on top but fit snugly on the sides! It’ll be cute and curvy!”

LOLOLOLOL

– Me, also in hindsight.

Now, I wanna tell you something about popcorn decreases.

I don’t know the RIGHT way to do them. And I didn’t look it up. And I STILL haven’t looked it up. And I’m not GONNA look it up. I am stubborn. Like a mule, if a mule had opposable thumbs to hold a crochet hook.

Thus far, my popcorns went like this:

  • Work 5 DCs into the stitch space.
  • Remove the hook from the loop. (hold the loop so you don’t lose it)
  • Insert the hook through the top of the first DC.
  • Grab the loop with the hook, pull through, and chain 1 to secure it.

For increases, I’d do that twice in the same stitch space. Tight, but easy. Decreases are a little different, though, because you’re having to pull two stitch spaces together, with the bulk of a popcorn stitch sitting between them.

SO! After a little trial and error… I present… the only-slightly-weird-looking popcorn decrease…

  • Work 2 DCs into the first stitch space.
  • Work a dc2tog across the popcorn from the previous row. (first half in the first stitch space, second half in the second stitch space)
  • Work 2 DCs into the second stitch space.
  • Remove the hook from the loop.
  • Insert the hook through the top of the first DC.
  • Grab the loop with the hook, pull through, and chain 1 to secure it.

For those who aren’t familiar, dc2tog is shorthand for “two double crochets together” – two double crochets with separate bottoms but a single top. It’s also called a “double crochet decrease”. There’s a pretty good video tutorial for it here.

You may be wondering why, if I just looked up a video to show you what a dc2tog is, I haven’t looked up how to do a popcorn decrease. It would be so easy, right?

Stubborn. Like. Mule.

So anyway. It ended up a tiny bit bulkier than the regular popcorns, but it worked! Feeling really good about myself, I moved on. 

A few rows later, I hit the end of one of the skein. I still had probably 1/5 of the other skein left to go. I’d heard that when working with two strands, you often hit the end of one strand before the other. I assume this is largely due to the way the strands wrap around each other and sit differently in your stitches. If you’re working in a single direction, it makes sense that one strand would be consumed a little faster.

I center pulled a fresh skein and tied the ends together, worked it into the middle of a popcorn, and worked the ends in.

About 5 popcorn stitches later, the new skein produced the biggest yarn barf I have ever seen. It had to have been a full quarter of the skein, just BLEARGH! …all over the table. I balled it up (alone this time, not together with the other strand) and moved on without incident.

So I got a few more rows done, the other starting skein died and I tied in its replacement. And then tried it on her head.

-_-

I think you can guess how that went.

Now, there’s no way I was about to frog this thing again. Not after the earlier experience of frogging double-stranded popcorn hell.

So I figured I’d try adding a brim to see how it came out. And hey, maybe the brim would snug it up that last little bit. And if it didn’t… well… I could always go into damage control mode… change the brim and make into a bag or a yarn bowl, or close it off and stuff it to use as a small throw pillow…

I started the brim with single crochet into the stitch spaces and chains across the popcorns, because I really really hate working into popcorns directly. Their tops are usually just too tight, and it distorts their shape to be worked into.

To make it look ribbed, I alternated front post double crochets around each single crochet, and regular double crochets around each chain space. At the front of the hat I did two double crochets in each chain space, to make it wider and naturally turn the brim up and out.

For the next row I did a front post dc around each front post dc, and back post DCs around each regular DC (doubling up in the front again to turn it up more). Then I finished it all off with an edge of single crochets into each stitch.

And done.

I mean… I like it. I like the effect of these massive popcorns in tight little rows. It’s pretty. But… no matter how stubborn I am… it’s just flat out too big for her. And it still ended up way too roomy on top.

Now that I think about it… the extra space in the top might work well for someone with thick, curly hair who needs that extra room on top to not ruin their hairdo… but my wife has straight hair, so it’s just a bubble of airy space up there between her head and the hat. (I’d definitely line it with linen if you’ve got curly hair, though. This thing will frizz you up like you wouldn’t believe.)

Because of how thick the popcorns are, it’s a fairly firm hat. It holds its shape and doesn’t flop much at all. If only it weren’t so big……

Huh. I just noticed that it fits me almost perfectly. Go figure… pity it’s not really my style.

Me!

So I guess it’s not a total failure after all…

Adventures in Crochet: A Purple Flower Hat!

2-Color Divine Hat (flat)

My first ever hat, for my 6 year old daughter! I followed the Divine Hat by Sarah Arnold pattern from Ravelry and was really happy with how it turned out! It took me about two weeks to finish, but… what can I say… I’m slow.

I really enjoyed the sequence of front post double crochets that form the ribbing. With as slowly as I crochet, having measurable milestones along the way really helps me stay focused and encouraged. Each set of stitches felt terminated by an FPDC, like I’d just completed another section.

It also made counting easier… I’m really bad at counting when I’m doing a long series of the same stitch.

The flower was just something I made while fiddling with in the same yarn. I did probably 3 different flower concepts before one turned out. Once the Divine Hat was done, I felt like it needed something more, so I tacked the flower on and it worked out great!

I think I can call this hat a success!

Stay tuned for one update… I had to add flaps to keep her ears warm!

Adventures in Crochet: Ripple Baby Blanket

Between Cub Scouts and life in general, the blog updates have slowed down. To all 3 of you following my adventures… sorry about that! I’m still trying to catch up on posts about all the projects I’ve worked on. This one was my first foray into making a baby blanket… and it went really well, I think!

I found out in May that a friend was having a baby in July… and I wanted to make something special for their family. So off I went in search of simple baby blankets! Luckily, my friend half_moon_doublecrochet pointed me to this one…

Beginners Round Ripple

by Donna Mason-Svara

I snagged some Lion Brand Big Scoop at Michael’s and got started!

The pattern was remarkably easy to work up while not paying a whole lot of attention to what I was doing. I got to practice decreases and increases, as well as yarn changes… and you know how sometimes when you’ve done 100 of the same stitch in a row you get kinda burned out? Well, the slight change at each point and valley in the pattern broke up the work just enough that it wasn’t boring or tedious.

So pointy!

It did work up just a smidge weirdly, though, thanks to the quick color changes in Big Scoop yarn. I used the Blueberry (white-blue variegated) as the primary yarn, with periodic rows of Cookies & Cream (white-gray variegated) to break it up… and there are places where the whites from each yarn ended up aligned, so it doesn’t actually break it up fully. If I do this pattern again, I’ll likely use a solid-colored yarn in place of the Cookies & Cream.

I used a small stretch of Lion Brand Jeans (Vintage color) yarn to do a solid final border, which I think helped finish it out nicely… but would have been way too dark for the interior separating rows.

Anyway, I was pretty dang happy with the final product, for my first baby blanket ever… and I’ve gotten to see the little guy tucked in with this one a couple times, and it warms my heart!

(And if you like my stuff… you’ll love half_moon_doublecrochet’s stuff! Check her out below!)

https://www.instagram.com/p/Bpk0H1YB8DX/?taken-by=half_moon_doublecrochet

Adventures in Crochet: Headbands Forever!

What’s the easiest thing you can think of to crochet, that someone you know might actually need or use?

The first person that came to mind for me was my daughter, whose hair is constantly falling in her face… and what could be easier to crochet than a simple headband? I mean, it’s a small rectangle that joins at the ends!

Right?

…Right?

On a related note, have you ever noticed that when you’re a beginning at something, sometimes even the easiest things are way harder than you expect them to be?

So anyway, moving on… I spent a few months making headbands. One after another. Perfecting my craft. I am now the best headband crocheter in the west.

Maybe not.

Basic Headband
Amazing craftsmanship!

I did spend a few months doing nothing but headbands, though. The one pictured above was my second. I swear I didn’t take pictures of the first. *cough*

That said, looking back at how uneven my stitching was back then… I have to admit I feel pretty encouraged. Maintaining even tension and stitching is something I still struggle with now, 6 months or so later, but at least it’s better than that!

So here are a few of the ones I finished. There are more… I just can’t find pictures! Maybe I’ll add them later…

Hungry Harvest Happiness

My family has been trying out Hungry Harvest, a “food waste reduction” farm-to-doorstep food delivery service. We’ve been really happy with the quality and quantity of produce we’ve received each week! Hungry Harvest takes food that supermarkets turned down for whatever reason (overstocking, too near the sell-by date, odd shapes, etc) and distributes that food.

There’s actually only one thing that’s disappointed me so far… we haven’t gotten any really crazy-shaped produce yet! 

Just lots of delicious fruits and veggies to add to our diet.

An Update About Updates

Spidey Hat

So I’ve been rather busy, with crochet and other projects. I made the choice (mistake?) of taking on a few medium-sized projects that had deadlines attached, and, well…

…let’s just say I’m not very good at estimating how long crochet projects take yet.

Point being, I’ve wanted to do some blog posts to update y’all on my projects, but I’ve been too busy actually DOING them! (Well, that and playing Rocket League, but that addiction is its own ball of yarn.)

I’ve definitely got some updates coming down the pipe, though. It’s just a matter of writing them. 😀

Adventures in Crochet: Making Mistakes!

Crochet and Gaming

If I’ve learned anything from years of role playing games… it’s that some adventures end early.

…so I picked up a cheap set of aluminum crochet hooks on Amazon, the yarn my daughter snagged at Michael’s, and started down this road, not knowing whether I’d stick with crochet or not.

The First Mistake

Yarn.

IMG_20180210_200235

I looked up a beginners crochet tutorial online, picked up my 10mm hook and my skein of super bulky gradient-colored yarn, and spent 30 grueling minutes desperately trying not to catch my hook in the fibers.

I managed a disgustingly messy chain 10 and frayed the hell out a solid yard of the yarn.

I mentioned my problem to some yarn friends.

“Yeah… that isn’t the best yarn for a fresh newbie. Try some normal worsted weight instead, until you get the hang of it.” was their reply.

Let me just say… that was good advice. Like… really good. I should have Googled “best yarn for beginners” level good. It was pretty obvious that the soft, thick, pretty yarn my daughter had snagged from the clearance bin was terrible for a beginner.

Worsted weight yarn is much easier to manage than that gorgeous super soft fuzzy stuff.

For any newbies reading this… I would also suggest sticking with single-color yarn at first. It’s easier to see your stitches, your mistakes, and eventually the little differences that result from variations in yarn tension and the like.

My lovely wife offered her yarn stash. And so I began on my first adventure in pink yarn.

The Second Mistake

Single crochet.

2 Color Headband

I made a square at first. Seemed logical… Practice a starting chain, single crochet a few rows… Figure out how to turn to a new row… (which is a skill that I struggled with for a long while).

Happy with the result of the square, on a whim I extended it longer and slip stitched the ends together, making a headband for my daughter. She loved it! I was a crochet success! I mean, my stitches weren’t super even, but I made a headband that didn’t fall apart when worn! I quickly set at making another in the same basic style, for my other daughter. Two headbands, done!

Then I decided to try out double crochet, and was utterly confused… I started asking people questions again.

Turns out those two headbands I did? Not single crocheted. Not remotely.

Back loop slipstitched.

Whoops.

For those unfamiliar with those terms… Slipstitch is a less complicated and looser stitch than single crochet. Back loop means that instead of attaching the new stitch to the old using both of its loops, I only used the one in back… resulting in an even looser weave.

The Third Mistake

Double crochet.

Spiral Bag Complete

I didn’t let that mistake discourage me. The best way to learn is to fuck it up, figure out how you fucked it up, and fix it.

As long as nobody gets hurt in the process, of course.

(Luckily, nobody did.)

So I practiced single crochet in a few little play projects, made another headband, then moved on to double crochet.

Let me tell you… It took me a while to figure out how I screwed that one up.

I was looking up a crocheted flower tutorial on YouTube, and watching this woman’s hook move during a double crochet… I said “wait, what?”

I looped that section for a bit and then it hit me.

She was doing one more yarn over in the middle of the stitch than I had been doing.

I searched for double crochet tutorials. They all supported this woman’s method. I asked some people. After describing what I’d done vs what she’d done, some said “…what?”

Others said “… You did a half double crochet?”

I looked it up. Nope, I had not accidentally done a half double crochet.

I still haven’t figured out what this stitch is called, but… I mean, it works. If anyone knows, comment. It’s YO, insert into both loops, YO, pull through, pull through 1 extra loop, YO, pull through 2.

Whoops again.

The Fourth Mistake

This is a pretty simple one… hooks. Don’t go too cheap. I discovered after a few projects that my 5mm aluminum hook (that was part of a $5 10-hook set) was snagging yarn… because of a little divot in the tip.

Invest in a decent set of hooks. Find ones that feel good in your hand, however you choose to hold your hook. Buy them one at a time if you need to.

Your hooks are going to last you a long time… buy accordingly.

No More Mistakes Ever!

Ha.

Hahahahaha.

HAHAHAHAHAHA!

No.

I continue to make mistakes, particularly when it comes to counting stitches… but I’m getting better at catching them quickly. Having made big, glaring mistakes early has been beneficial. I now have an eye out for warning signs of bad stitches, wrong stitches, and other mistakes. Every mistake I make, I know to watch out for more carefully as I proceed.

And having survived those trials, I’m now sure that this adventure is going to continue for quite a while.